Ever wondered what the perfect wallet size photo dimensions are? Well, buckle up because we're diving deep into the world of tiny yet oh-so-important prints. Whether you're preparing for ID cards, passport photos, or just want to impress your friends with some cool wallet pics, this guide has got you covered. Wallet-sized photos might seem simple, but trust me, there's more to them than meets the eye.
Let's face it, we live in a digital age where everything is stored on our phones. But sometimes, there's just something special about holding a physical photo in your hands. And when it comes to wallet-sized photos, getting the dimensions right is crucial. You don't want to end up with a blurry mess or cropped faces, right? So, let's break it down step by step.
In this article, we'll explore everything you need to know about wallet size photo dimensions. From the standard sizes to tips for editing and printing, we've got all the juicy details you've been craving. So, whether you're a photography enthusiast or just someone looking to get their game face on, keep reading!
What Exactly Are Wallet Size Photos?
Wallet size photos are those adorable little snapshots that fit perfectly in your wallet, purse, or even your pocket. They're compact, easy to carry, and a great way to keep cherished memories close. But here's the deal—these photos come in specific dimensions to ensure they look sharp and professional.
Typically, wallet size photos measure **2 x 3 inches**. That's the standard size used by most photo labs and printing services. However, depending on where you're getting them printed, you might encounter slight variations. So, always double-check with your chosen service provider to avoid any hiccups.
Why Do Dimensions Matter?
Dimensions matter because they determine how your photo will look when printed. If the aspect ratio is off, your image might get stretched, squished, or cropped. And let's be honest, nobody wants a headshot that looks like it belongs in a funhouse mirror.
- Correct dimensions ensure your photo retains its original proportions.
- They help maintain image quality during printing.
- Proper sizing prevents unnecessary cropping, so you won't lose important parts of the picture.
So, before you hit that print button, make sure your photo is sized correctly. Trust me, your future self will thank you for it.
Standard Wallet Size Photo Dimensions
Now that we've established what wallet size photos are, let's dive into the nitty-gritty of their dimensions. The most common size is, as mentioned earlier, **2 x 3 inches**. But did you know there are other variations too? Let's take a closer look:
- 2 x 3 inches: The classic wallet size, perfect for ID cards, passports, and general use.
- 2.1 x 3.5 inches: A slightly larger version, often used for professional headshots.
- 2.5 x 3.5 inches: Commonly used in some countries for official documents.
These variations might seem small, but they can make a big difference when it comes to printing. Always verify the required dimensions for your specific use case to avoid any mishaps.
Understanding Aspect Ratios
Aspect ratio refers to the proportional relationship between an image's width and height. For wallet size photos, the aspect ratio is usually **2:3**. This means that for every 2 units of width, there are 3 units of height. Keeping this ratio intact ensures your photo doesn't get distorted during printing.
Here's a quick tip: If you're resizing your photo manually, use editing software that allows you to lock the aspect ratio. This way, you won't accidentally mess up the proportions.
How to Create Wallet Size Photos
Creating wallet size photos is easier than you think. With the right tools and techniques, you can turn any digital image into a print-ready masterpiece. Here's how:
Step 1: Choose the Right Image
Start by selecting a high-quality image. The resolution should be at least **300 DPI (dots per inch)** to ensure sharpness when printed. Avoid using blurry or low-resolution photos, as they won't look good in print.
Step 2: Resize the Image
Use photo editing software like Photoshop, GIMP, or even free online tools to resize your image. Set the dimensions to **2 x 3 inches** and ensure the resolution is set to 300 DPI. Don't forget to lock the aspect ratio to prevent distortion.
Step 3: Crop if Necessary
If your image doesn't fit perfectly within the 2:3 aspect ratio, you might need to crop it. Be careful not to cut out important details, such as faces or key elements of the scene. Use the crop tool to adjust the framing until you're satisfied.
Step 4: Save and Print
Once you're happy with your edits, save the file in a print-friendly format like JPEG or TIFF. Then, head over to your preferred printing service and upload your file. Most services offer wallet size prints at affordable prices, so you won't break the bank.
Common Mistakes to Avoid
Even the best of us make mistakes sometimes. But when it comes to wallet size photos, a little extra care can go a long way. Here are some common pitfalls to watch out for:
- Using low-resolution images that appear blurry when printed.
- Ignoring aspect ratios, resulting in stretched or squished photos.
- Not cropping the image properly, leading to unwanted cuts.
- Forgetting to verify the required dimensions for your specific use case.
By avoiding these mistakes, you'll end up with wallet size photos that look as good in print as they do on your screen.
Tips for Avoiding Mistakes
Here are a few tips to help you sidestep those pesky errors:
- Always check the printing service's guidelines for dimensions and resolution.
- Use editing software that automatically adjusts aspect ratios and resolutions.
- Preview your photo before printing to catch any issues early.
With these tips in mind, you'll be well on your way to creating flawless wallet size photos.
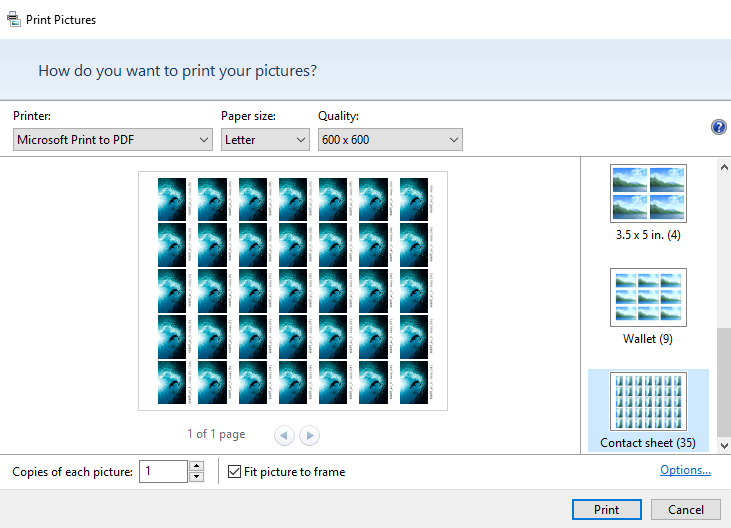
Where to Get Wallet Size Photos Printed
Now that you've got your wallet size photo ready, it's time to print it. But where should you go? Here are some popular options:
1. Local Print Shops
Your local print shop is a great place to start. They often offer quick turnaround times and can provide personalized assistance if you have any questions. Plus, you get the satisfaction of holding your finished product in your hands right away.
2. Online Printing Services
For convenience, online printing services like Snapfish, Shutterfly, and Walgreens are hard to beat. Simply upload your file, choose your options, and wait for your prints to arrive at your doorstep. Many of these services also offer discounts and promotions, so keep an eye out for deals.
3. DIY Printing
If you're feeling adventurous, you can try printing wallet size photos at home. Invest in a decent photo printer and quality paper, and you'll be good to go. Just remember to calibrate your printer settings to ensure accurate colors and sharpness.
Using Wallet Size Photos for Official Documents
Wallet size photos aren't just for personal use—they're also essential for official documents like passports, visas, and driver's licenses. But when using them for such purposes, there are additional rules and regulations to follow.
Official Requirements
Each country and organization may have its own requirements for wallet size photos. Some common guidelines include:
- Specific dimensions (e.g., **2 x 2 inches** for U.S. passports).
- Neutral background colors (usually white or off-white).
- No smiles or expressions—neutral facial expressions are preferred.
- Proper lighting to ensure even exposure.
Always check the specific requirements for the document you're applying for to avoid any delays or rejections.
Tips for Official Photos
Here are some tips to help you ace your official wallet size photos:
- Wear simple, solid-colored clothing to avoid distractions.
- Make sure your face is well-lit and evenly exposed.
- Avoid wearing accessories like hats, glasses, or jewelry that could obstruct your face.
Following these tips will help you create wallet size photos that meet official standards.
Conclusion: Wrapping It All Up
Wallet size photo dimensions might seem like a small detail, but they play a big role in ensuring your prints look their best. By understanding the standard sizes, aspect ratios, and printing options, you can create wallet-sized photos that are both professional and personal.
So, whether you're preparing for an official document or just want to keep a cherished memory close, remember these key points:
- Standard wallet size dimensions are **2 x 3 inches**.
- Always maintain the correct aspect ratio to avoid distortion.
- Use high-quality images with a resolution of at least 300 DPI.
- Verify the specific requirements for your intended use case.
Now that you're armed with all this knowledge, it's time to put it into practice. Grab your favorite photo, resize it to wallet size, and get printing! And don't forget to share your experience in the comments below. We'd love to hear how your wallet size photo adventure turns out.
Happy snapping!
Table of Contents