Imagine this—you’ve got a Raspberry Pi sitting at home, humming quietly behind your router, just waiting to be unleashed into the world of IoT. But how do you tap into its potential when it’s tucked away behind layers of network security? This is where the magic happens. Accessing IoT devices behind a router with a Raspberry Pi isn’t just for tech wizards anymore. It’s becoming increasingly accessible, even for beginners who want to dip their toes into the vast ocean of smart tech. Whether you’re setting up a home automation system or building a remote weather station, understanding how to connect your Raspberry Pi securely to the outside world is key.
The beauty of IoT (Internet of Things) lies in its ability to make our lives smarter, more efficient, and interconnected. From controlling your lights with a smartphone app to monitoring your garden’s moisture levels remotely, the possibilities are endless. However, there’s often a roadblock when it comes to accessing these devices from outside your local network. That’s where tools like Raspberry Pi come in handy, offering an affordable and flexible solution to bridge the gap between your devices and the internet.
In this guide, we’ll break down step-by-step how to access IoT devices behind a router using Raspberry Pi examples. We’ll cover everything from setting up port forwarding to configuring secure connections, ensuring that your smart devices remain protected while still being accessible. So, grab a cup of coffee, and let’s dive into the exciting world of IoT and Raspberry Pi!
Here’s what you can expect in this article:
- What is IoT and Why Does It Matter?
- Raspberry Pi Basics: Setting the Foundation
- Networking Essentials: Understanding Routers and Ports
- Accessing IoT Devices Behind a Router
- Port Forwarding: The Key to Remote Access
- Dynamic DNS: Staying Connected
- Security Best Practices for IoT Devices
- Example Projects with Raspberry Pi
- Troubleshooting Tips for IoT Setup
- Conclusion: Your Journey into IoT
What is IoT and Why Does It Matter?
IoT, or Internet of Things, refers to the network of physical objects—devices, vehicles, appliances, and more—embedded with sensors, software, and connectivity that allow them to exchange data. Essentially, it’s about making everyday objects "smart" by connecting them to the internet. Think about your smart fridge that tells you when you’re running low on milk or your thermostat that adjusts automatically based on your preferences.
But why does IoT matter? Well, it’s all about convenience, efficiency, and innovation. IoT has the potential to transform industries, from healthcare to manufacturing, by enabling real-time data collection and analysis. For individuals, it means having greater control over their environment and saving time on mundane tasks. Imagine being able to turn off your lights or lock your doors with just a tap on your phone—even if you’re miles away.
IoT Growth and Trends
According to a report by Statista, the global IoT market is expected to reach over $1.5 trillion by 2025. That’s a massive growth from its current valuation, driven by advancements in technology and increasing consumer demand for smart solutions. The rise of IoT isn’t just limited to consumer electronics; it’s also making waves in industrial applications, such as predictive maintenance and supply chain optimization.
Here are some key trends shaping the IoT landscape:
- Edge Computing: Processing data closer to the source reduces latency and improves performance.
- 5G Connectivity: Faster and more reliable networks enable seamless communication between devices.
- AI Integration: Artificial intelligence enhances IoT capabilities by enabling smarter decision-making.
Raspberry Pi Basics: Setting the Foundation
Now, let’s talk about the star of the show—the Raspberry Pi. This tiny yet powerful single-board computer has become a favorite among hobbyists, educators, and professionals alike. Its affordability, versatility, and ease of use make it an ideal platform for experimenting with IoT projects.
Before diving into accessing IoT devices behind a router, it’s essential to understand the basics of Raspberry Pi. Here’s a quick rundown:
Key Features of Raspberry Pi
- Compact Size: About the size of a credit card, it’s perfect for embedded systems.
- Multiple Interfaces: Equipped with USB ports, GPIO pins, and HDMI output for various connections.
- Open-Source Software: Runs on Linux-based operating systems, offering flexibility and customization options.
- Community Support: A vibrant community provides tons of tutorials, forums, and resources to help you get started.
For beginners, the Raspberry Pi 4 Model B is highly recommended due to its improved performance and compatibility with modern applications. Whether you’re setting up a basic web server or running machine learning models, the Pi has got you covered.
Networking Essentials: Understanding Routers and Ports
Alright, let’s get technical for a moment. To access IoT devices behind a router, you need to understand the basics of networking. Your router acts as a gateway between your local network and the internet, assigning private IP addresses to devices within your network. However, these private IPs aren’t visible to the outside world, which poses a challenge when trying to connect remotely.
That’s where ports come into play. Ports are like channels that allow specific types of data to pass through. For example, HTTP traffic typically uses port 80, while HTTPS uses port 443. By configuring your router to forward incoming requests on certain ports to your Raspberry Pi, you can create a pathway for external access.
Types of Network Addresses
- Public IP Address: Assigned by your ISP, this is the address used to identify your network on the internet.
- Private IP Address: Assigned by your router, this is used for communication within your local network.
Understanding the difference between these two is crucial for setting up remote access. Your Raspberry Pi will have a private IP address, but you’ll need to use your public IP address to connect to it from outside your network.
Accessing IoT Devices Behind a Router
Now that we’ve covered the basics, let’s dive into the main event—accessing IoT devices behind a router. There are several methods to achieve this, each with its own pros and cons. We’ll explore a few popular approaches and provide examples to help you get started.
Method 1: Port Forwarding
Port forwarding is one of the simplest ways to allow external access to your Raspberry Pi. By configuring your router to forward incoming requests on a specific port to your Pi’s private IP address, you can create a direct connection. However, this method requires some technical know-how and may pose security risks if not set up correctly.
Steps to Set Up Port Forwarding:
- Log in to your router’s admin interface using its IP address (usually something like 192.168.1.1).
- Locate the port forwarding settings and add a new rule.
- Specify the external port (e.g., 8080) and the internal IP address of your Raspberry Pi.
- Save the changes and test the connection.
Remember, your router’s interface may vary depending on the manufacturer, so refer to your router’s manual for specific instructions.
Method 2: Dynamic DNS
Another approach is to use Dynamic DNS (DDNS), which allows you to assign a domain name to your public IP address. This is especially useful if your ISP assigns a dynamic IP address, meaning it changes periodically. With DDNS, you can access your Raspberry Pi using a consistent domain name, regardless of IP changes.
Popular DDNS Services:
- No-IP
- DDNS.net
- Google Domains
These services typically offer free and paid plans, with varying levels of features and reliability. Choose one that suits your needs and follow their setup instructions to integrate with your Raspberry Pi.
Port Forwarding: The Key to Remote Access
As we mentioned earlier, port forwarding is a critical component of accessing IoT devices behind a router. Let’s delve deeper into this topic and discuss some best practices to ensure a secure and reliable connection.
Security Considerations
While port forwarding simplifies remote access, it also opens up potential vulnerabilities. Hackers could exploit open ports to gain unauthorized access to your network. To mitigate this risk, consider the following tips:
- Use Strong Passwords: Avoid using default credentials for your router and Raspberry Pi.
- Enable Firewall Rules: Restrict access to specific IP addresses or ranges.
- Regularly Update Firmware: Keep your router and Pi software up to date to patch security flaws.
By implementing these measures, you can enjoy the benefits of remote access without compromising your network’s security.
Dynamic DNS: Staying Connected
Dynamic DNS (DDNS) plays a vital role in maintaining consistent access to your Raspberry Pi, especially if your ISP assigns a dynamic IP address. Let’s explore how DDNS works and how you can set it up for your IoT projects.
When you sign up for a DDNS service, you’ll receive a domain name (e.g., mypi.ddns.net) that maps to your public IP address. Whenever your IP changes, the DDNS client on your Raspberry Pi automatically updates the mapping, ensuring that your domain remains valid.
Setting Up DDNS on Raspberry Pi
Steps to Configure DDNS:
- Install a DDNS client on your Raspberry Pi using a package manager like apt.
- Sign up for a DDNS service and create an account.
- Configure the client with your DDNS credentials and start the service.
- Test the setup by accessing your Pi using the assigned domain name.
With DDNS in place, you’ll have peace of mind knowing that your IoT devices remain accessible, no matter what your IP address is.
Security Best Practices for IoT Devices
As the saying goes, "Security is not a feature; it’s a mindset." When dealing with IoT devices, it’s crucial to prioritize security to protect your data and network. Here are some best practices to keep in mind:
Encrypt Your Connections
Use HTTPS instead of HTTP to encrypt data transmitted between your Raspberry Pi and external clients. This ensures that sensitive information, such as login credentials, remains secure.
Monitor for Intrusions
Implement intrusion detection systems (IDS) to monitor for suspicious activities on your network. Tools like Fail2Ban can help block malicious IP addresses that attempt to brute-force your Pi.
Limit Access
Restrict access to your IoT devices by configuring firewall rules and using secure authentication methods. Avoid exposing unnecessary services to the internet and disable unused ports.
Example Projects with Raspberry Pi
Now that you’ve learned the technical aspects of accessing IoT devices behind a router, let’s look at some exciting projects you can try with your Raspberry Pi. These examples demonstrate the versatility and potential of IoT in real-world applications.
Project 1: Smart Home Automation
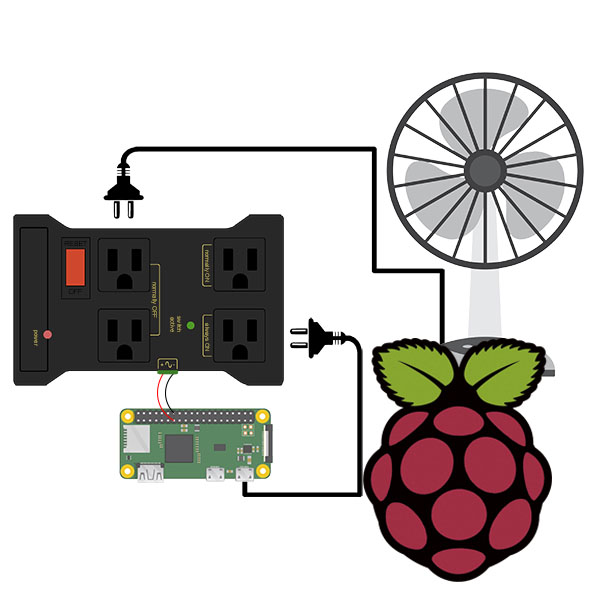
Create a centralized hub for controlling smart devices in your home. Use the Raspberry Pi to interface with sensors and actuators, allowing you to automate tasks like adjusting lighting or regulating temperature.
Project 2: Remote Weather Station
Set up a weather station using a Raspberry Pi and sensors to monitor environmental conditions like temperature, humidity, and air pressure. Access the data remotely via a web interface or mobile app.
Project 3: Surveillance System
Build a DIY surveillance system by connecting a camera module to your Raspberry Pi. Stream live video footage over the internet and receive alerts when motion is detected.
Troubleshooting Tips for IoT Setup